> ## Documentation Index
> Fetch the complete documentation index at: https://docs-d0.donutbrowser.ai/llms.txt
> Use this file to discover all available pages before exploring further.
# The Trade Panel
> Spot, perpetual futures, prediction markets, and DeFi positions in one view. Pick a market, click Trade, confirm.
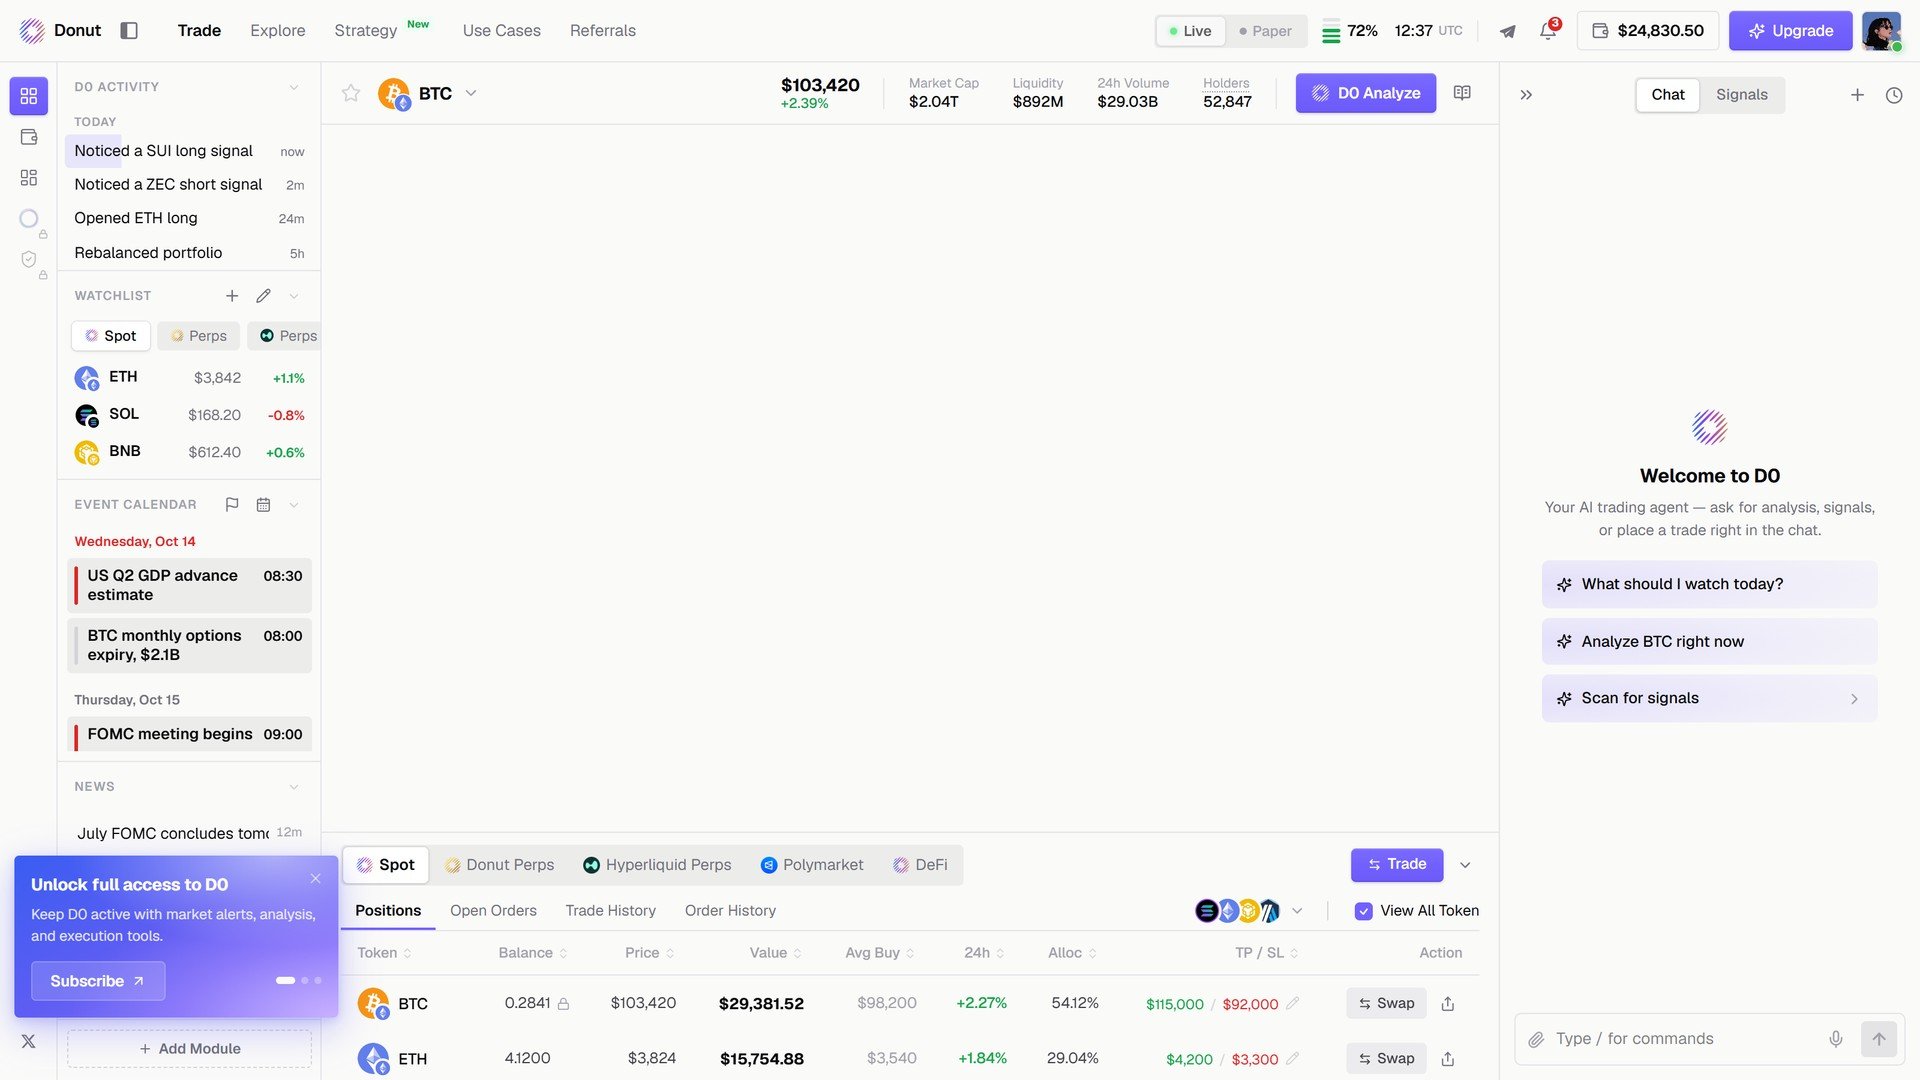
**Trade** is the first tab in the top bar and the console's home. The market header and chart sit in the center, your positions across every venue sit below them, and the order modal opens from the **Trade** button.
 ## What you can do
| Action | How |
| - | - |
| Switch markets | Click the token name in the market header and pick another market. ★ adds it to your Watchlist. |
| Place a spot order | **Trade → Spot**: Market or Limit, with **Half** / **Max** shortcuts and optional TP/SL. |
| Trade perps | **Trade → Perps**: Long or Short, Cross or Isolated, leverage, size, TP/SL, Reduce Only. |
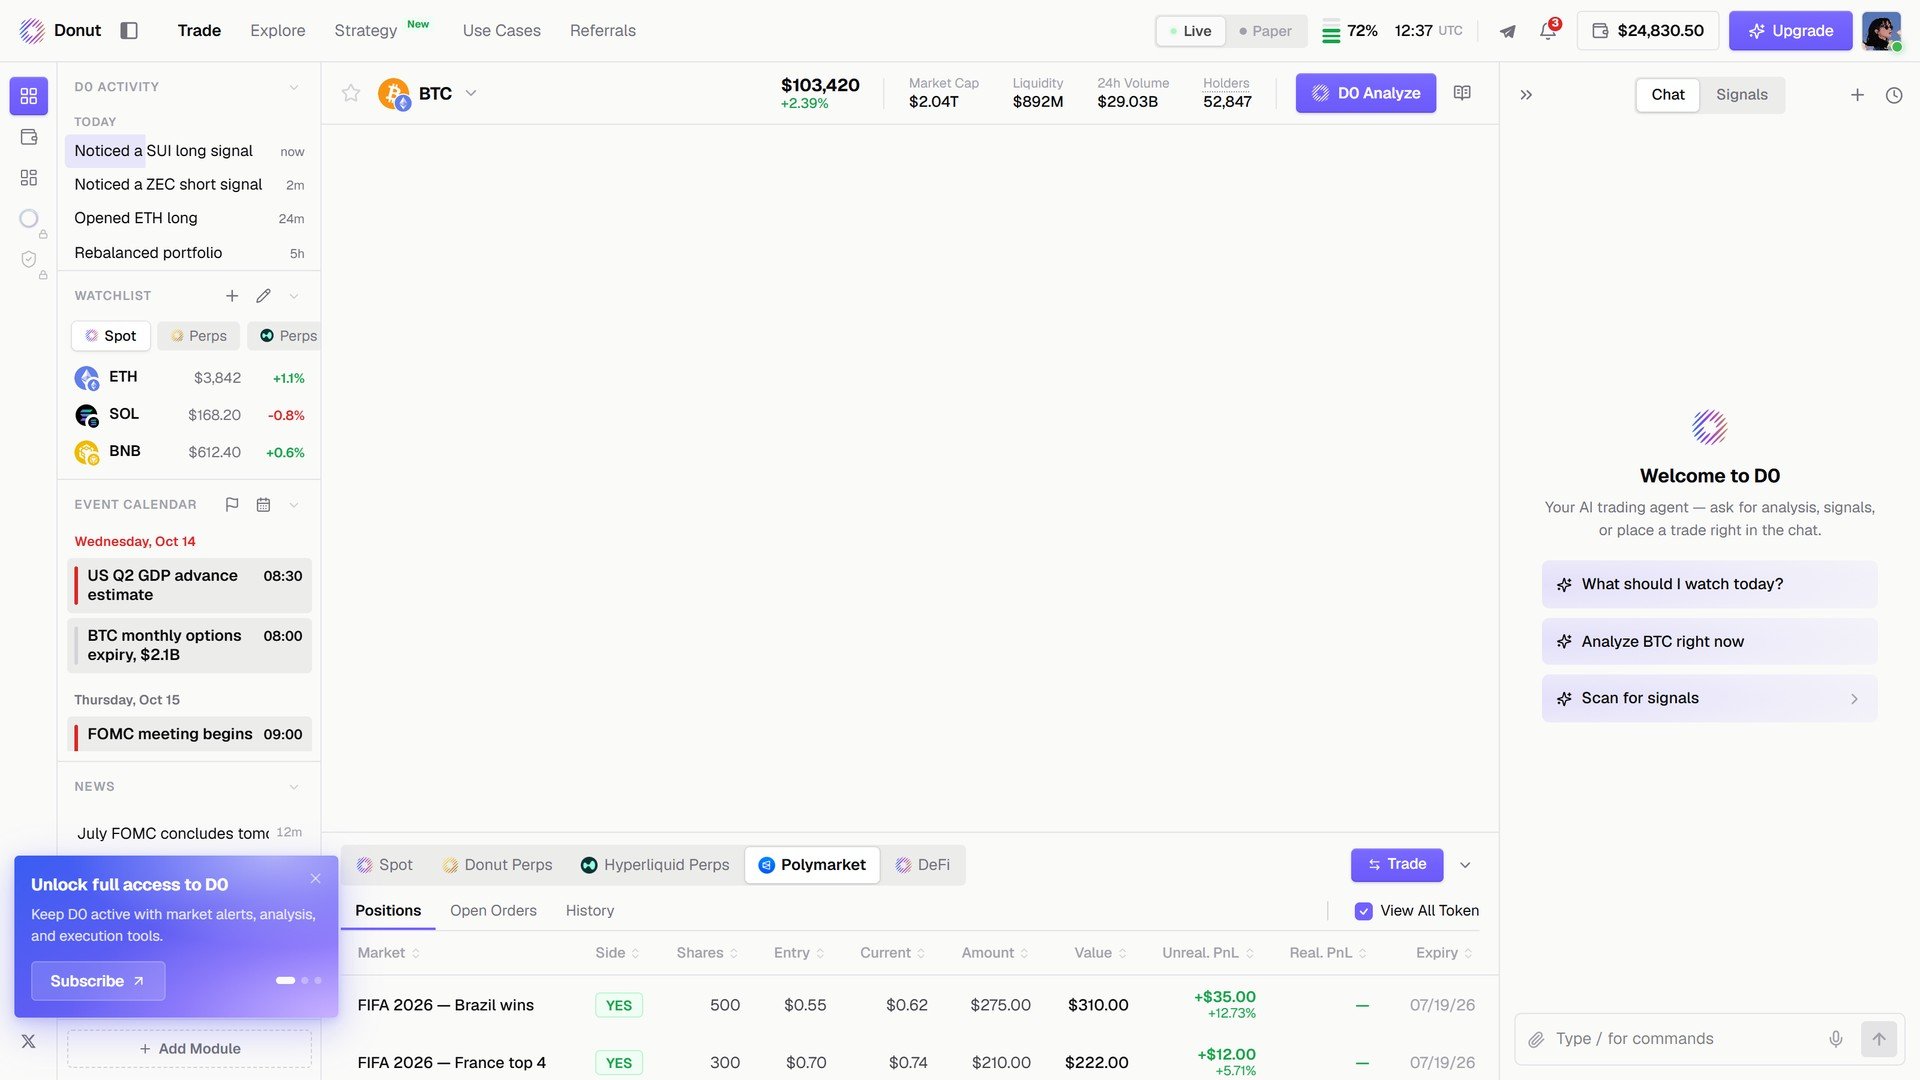
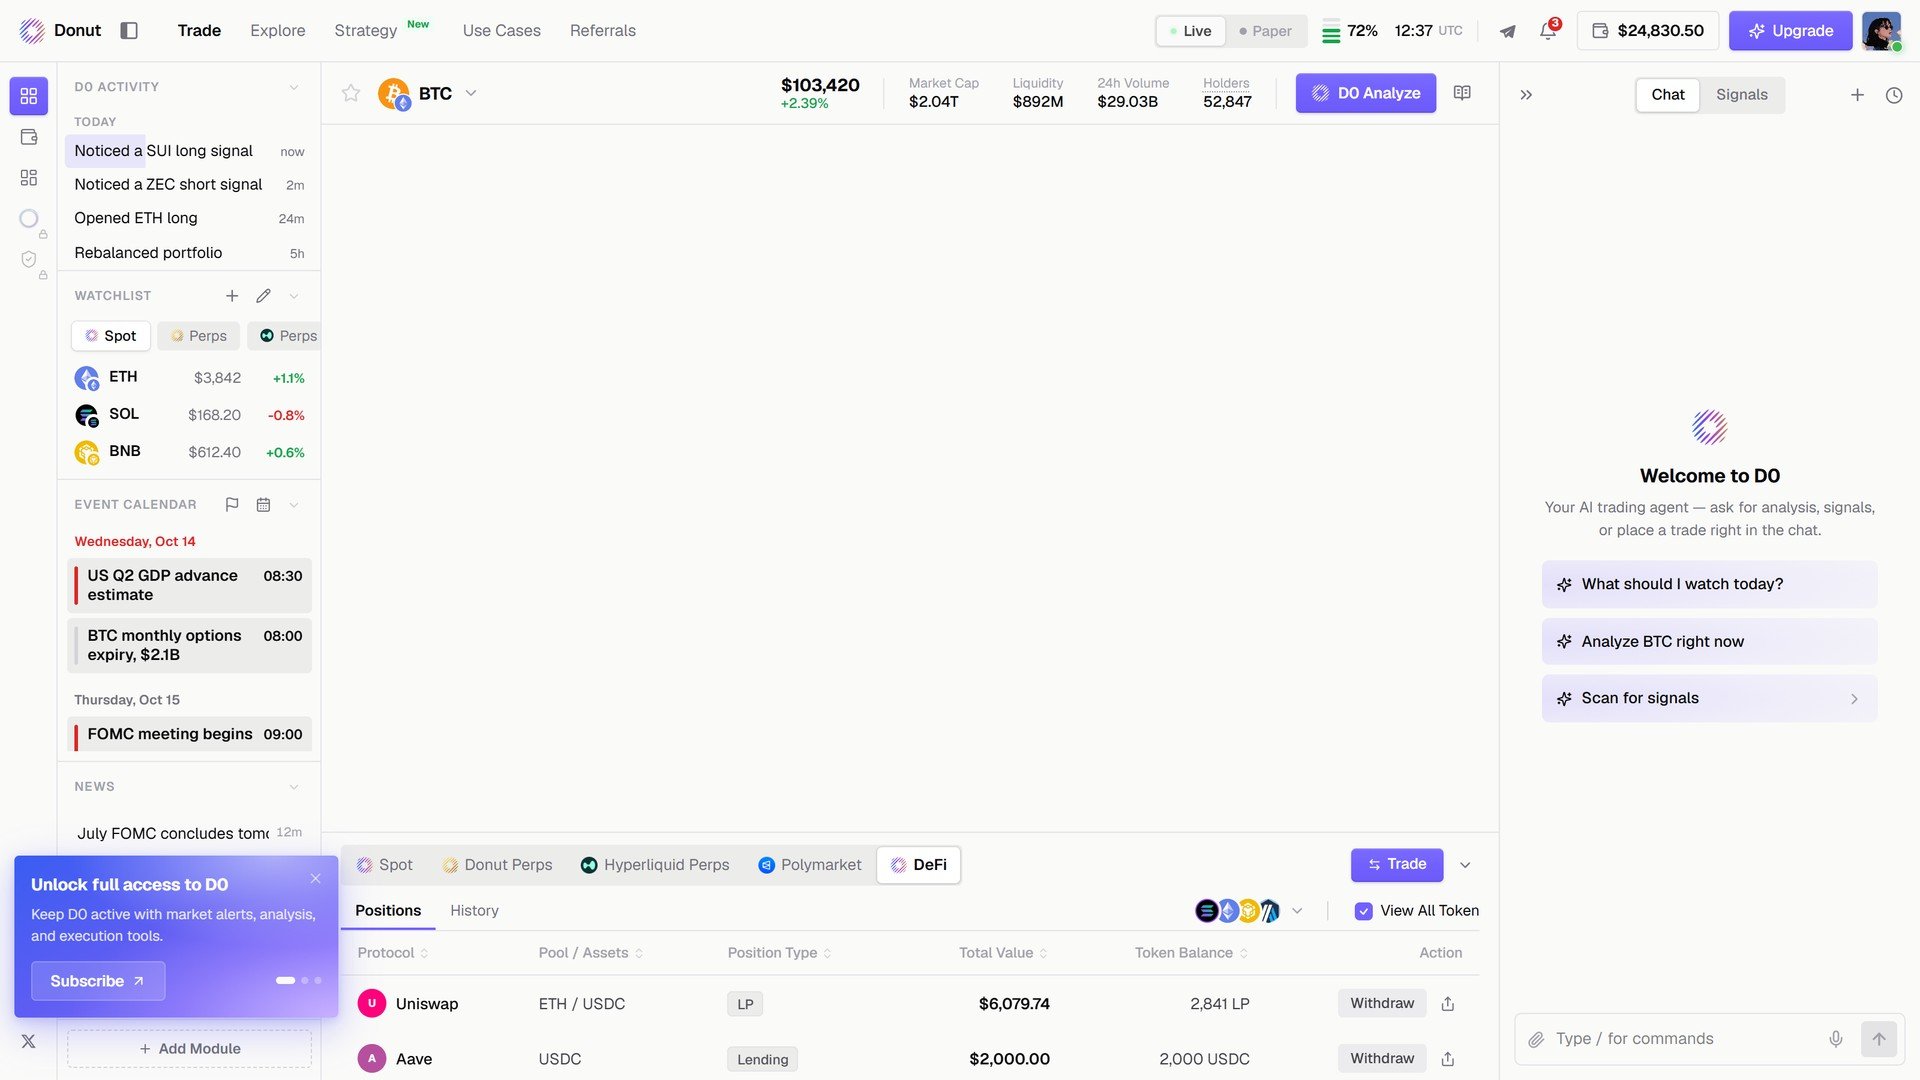
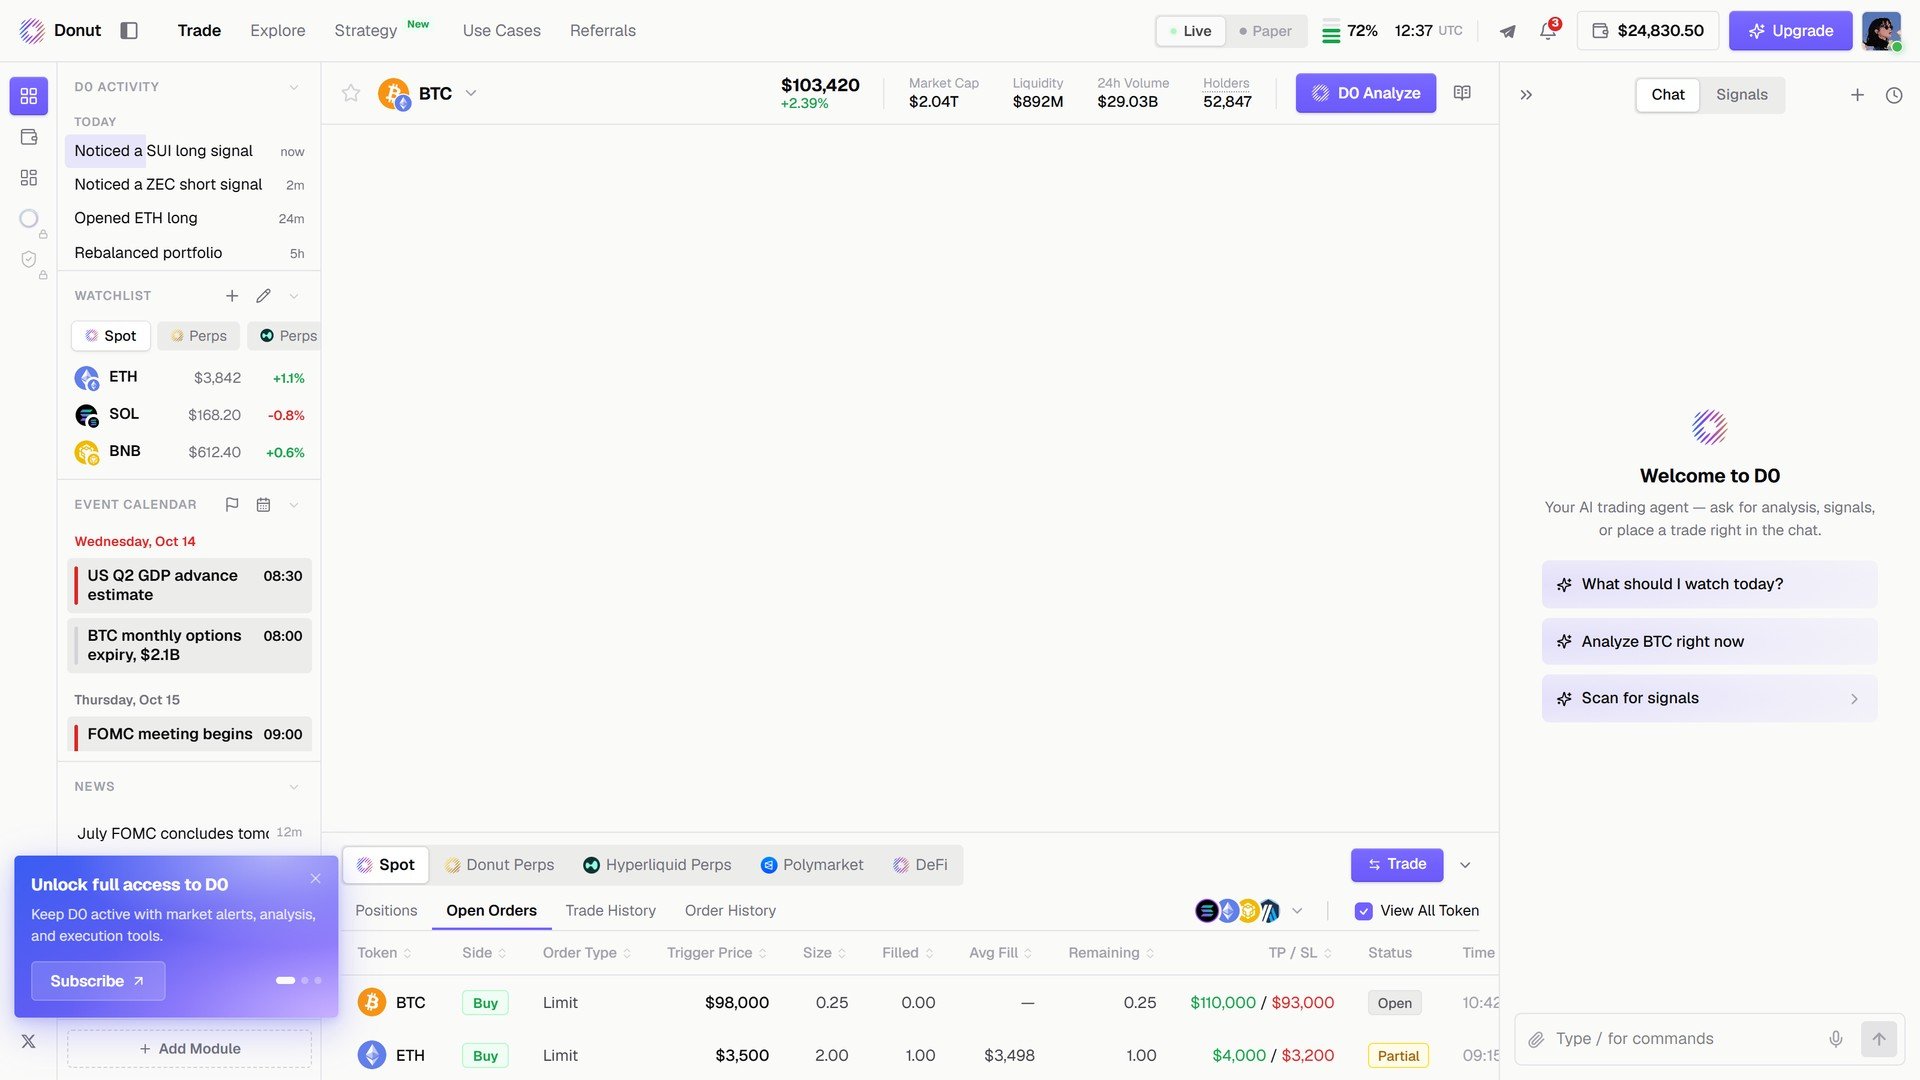
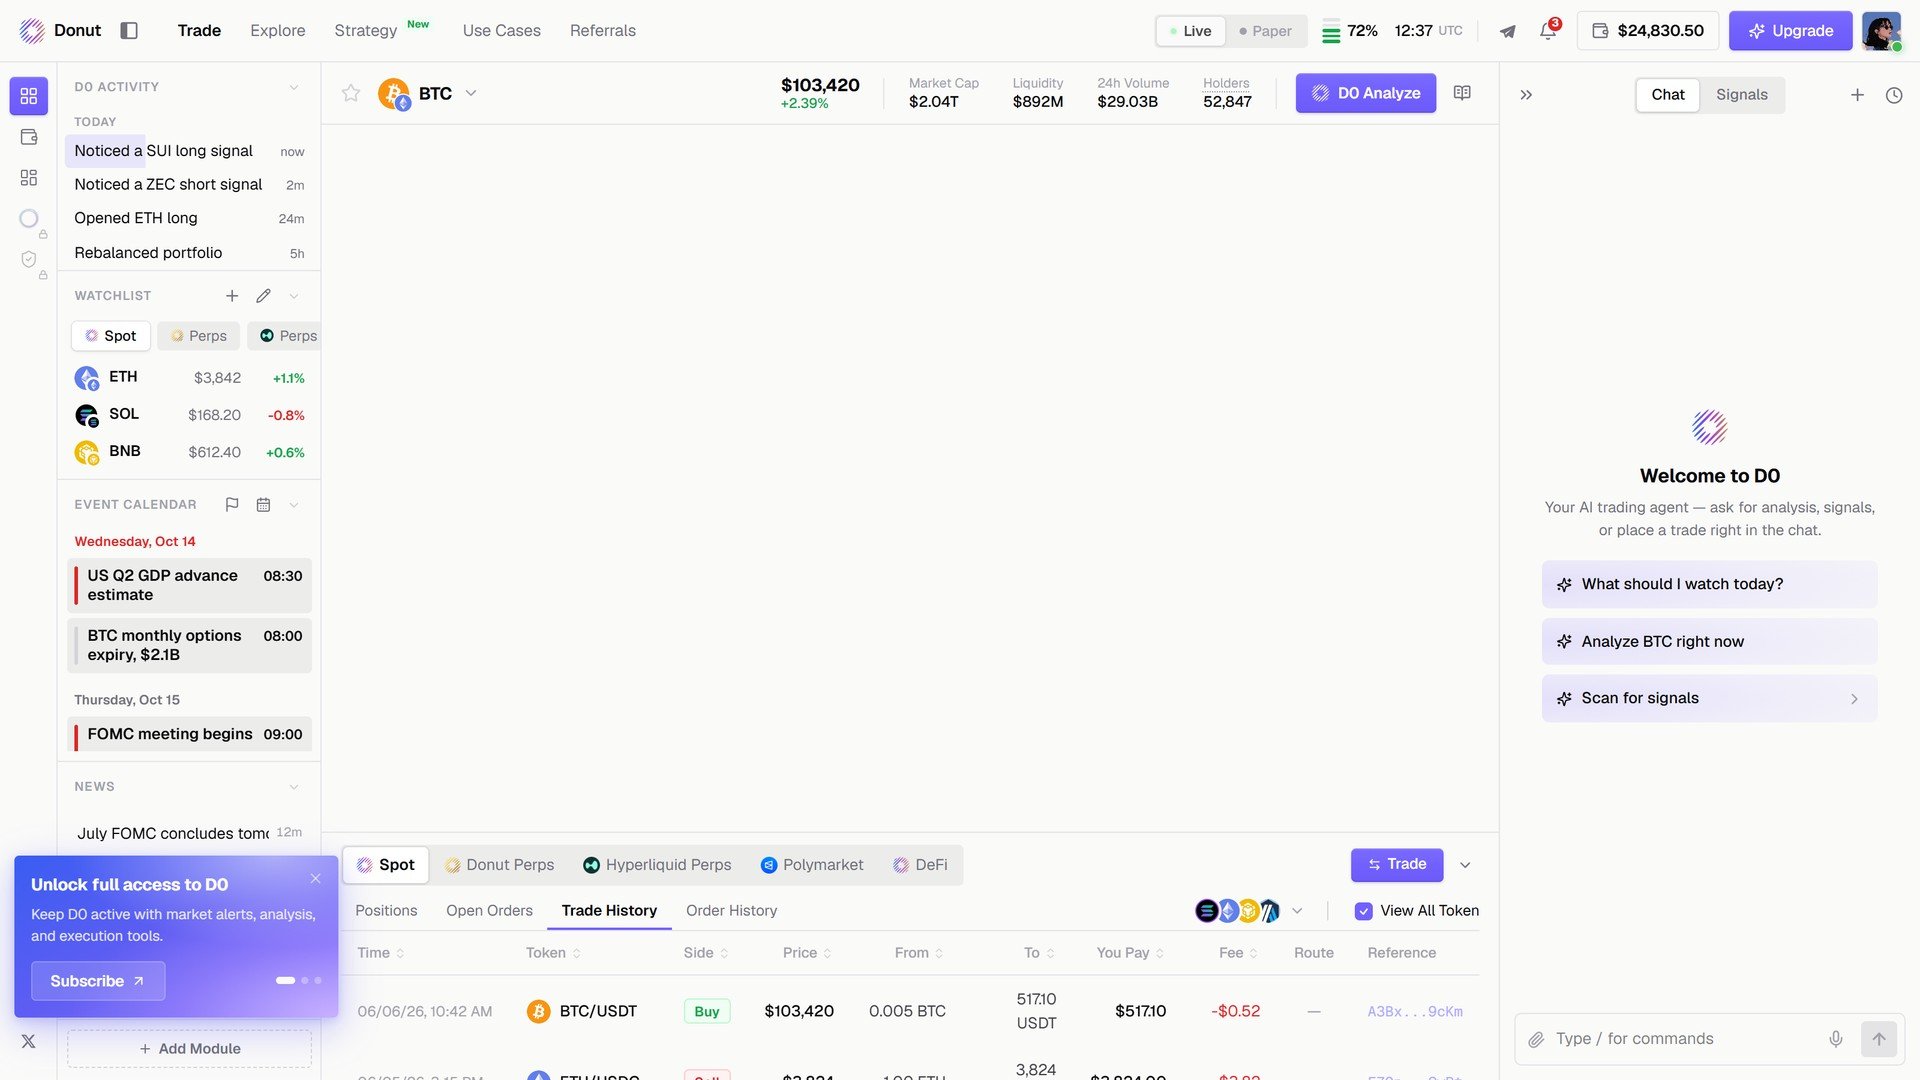
| See every venue's positions | The tabs under the chart: **Spot**, **Donut Perps**, **Hyperliquid Perps**, **Polymarket**, **DeFi**. |
| Swap from a position row | Each Spot row has a **Swap** action. |
| Ask D0 about the market | Click **D0 Analyze** in the header. See [D0 Analyze](/trade/do-analyze). |
## The five venues
| Venue | What it is |
| - | - |
| **Spot** | Plain buys and sells. Solana and EVM chains. |
| **Donut Perps** | D0's native perpetuals. BTC up to 150x leverage, most assets up to 75x. |
| **Hyperliquid Perps** | External perps, up to 40x depending on the pair. |
| **Polymarket** | Prediction markets. Positions show the outcome, price, and resolution. |
| **DeFi** | Lending, LP, and vault positions (Kamino, Uniswap, Aave and others). |
## Placing an order
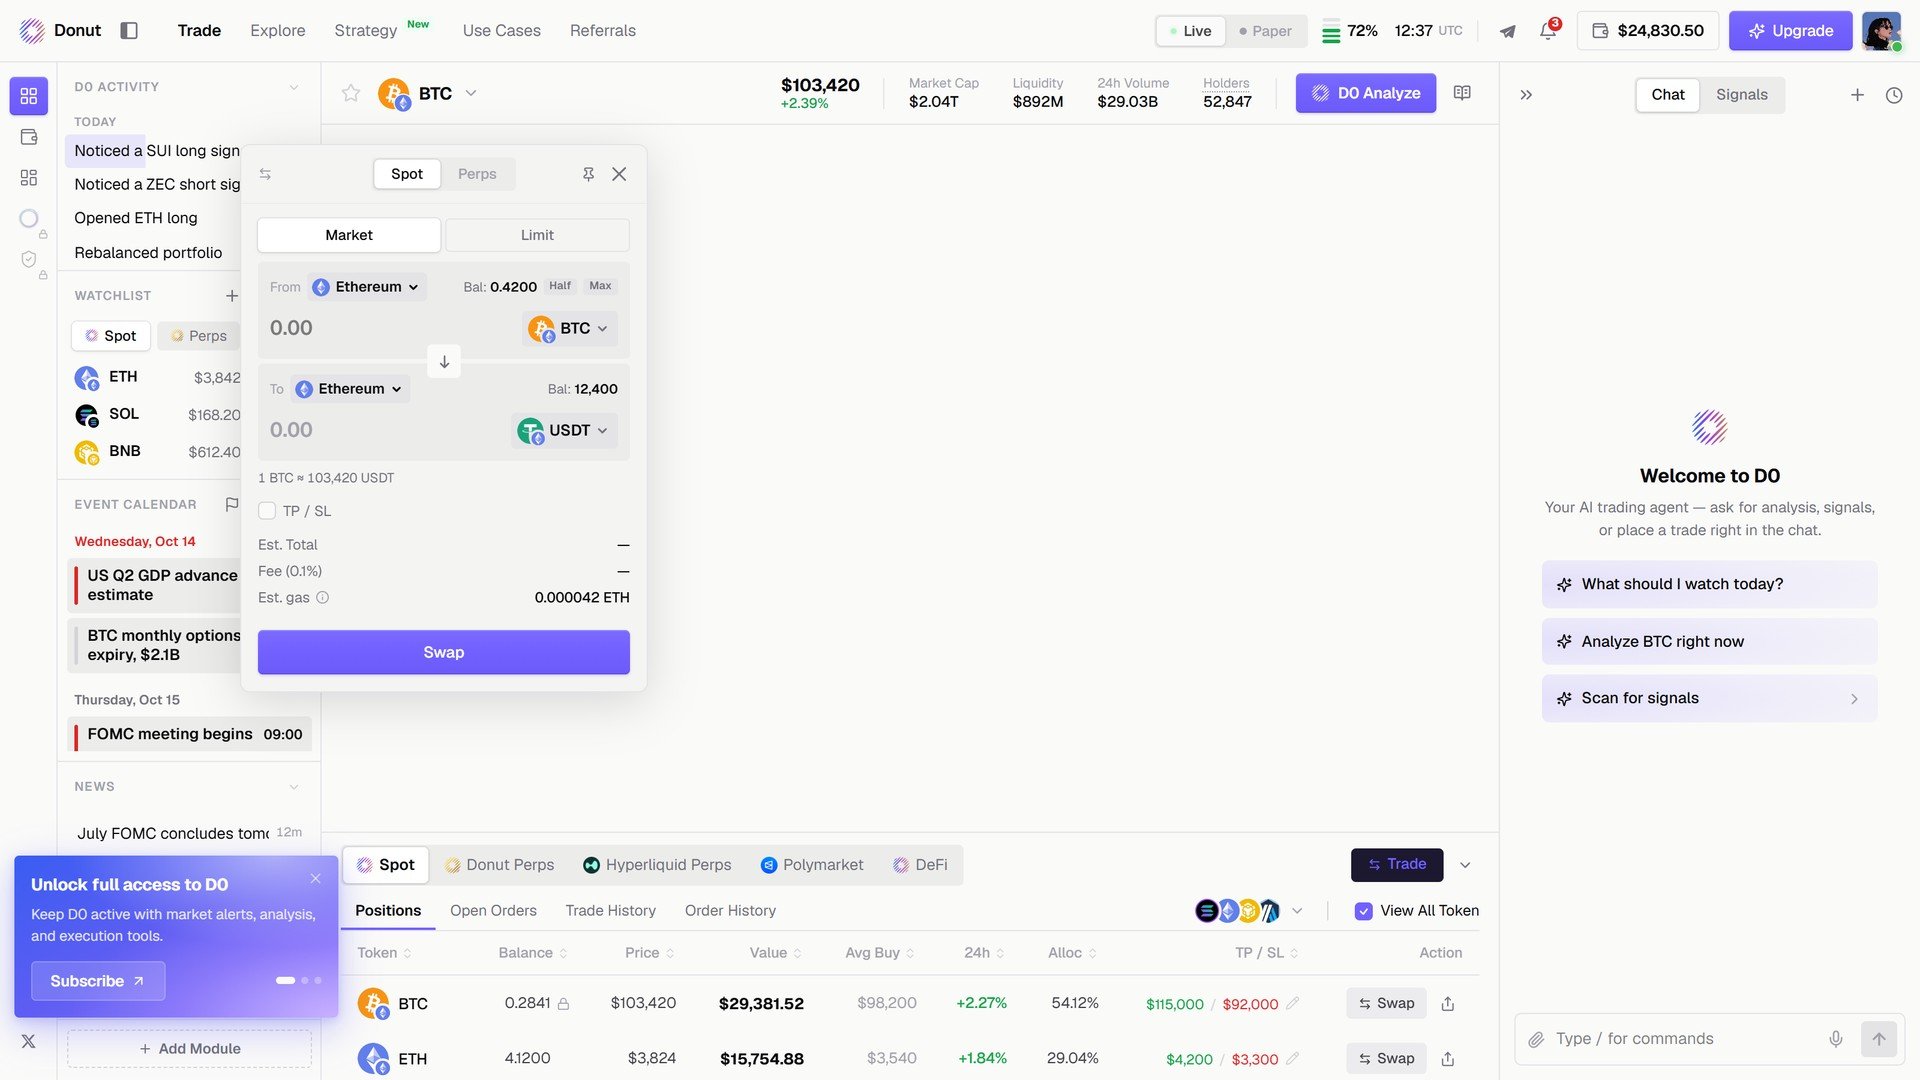
Click **Trade** under the chart. The order modal has two tabs: **Spot** and **Perps**.
### Spot
| Field | What it means |
| - | - |
| **Market** / **Limit** | Market executes now. Limit lets you set a price and an expiry. |
| **From** / **To** | The pair, with balances. **Half** / **Max** fill 50% or 100% of your balance. |
| **TP / SL** | Optional take profit and stop loss attached to the swap. |
| **Est. Total**, **Fee (0.1%)**, **Est. gas** | What you pay, before you confirm. |
Click **Swap** to confirm.
## What you can do
| Action | How |
| - | - |
| Switch markets | Click the token name in the market header and pick another market. ★ adds it to your Watchlist. |
| Place a spot order | **Trade → Spot**: Market or Limit, with **Half** / **Max** shortcuts and optional TP/SL. |
| Trade perps | **Trade → Perps**: Long or Short, Cross or Isolated, leverage, size, TP/SL, Reduce Only. |
| See every venue's positions | The tabs under the chart: **Spot**, **Donut Perps**, **Hyperliquid Perps**, **Polymarket**, **DeFi**. |
| Swap from a position row | Each Spot row has a **Swap** action. |
| Ask D0 about the market | Click **D0 Analyze** in the header. See [D0 Analyze](/trade/do-analyze). |
## The five venues
| Venue | What it is |
| - | - |
| **Spot** | Plain buys and sells. Solana and EVM chains. |
| **Donut Perps** | D0's native perpetuals. BTC up to 150x leverage, most assets up to 75x. |
| **Hyperliquid Perps** | External perps, up to 40x depending on the pair. |
| **Polymarket** | Prediction markets. Positions show the outcome, price, and resolution. |
| **DeFi** | Lending, LP, and vault positions (Kamino, Uniswap, Aave and others). |
## Placing an order
Click **Trade** under the chart. The order modal has two tabs: **Spot** and **Perps**.
### Spot
| Field | What it means |
| - | - |
| **Market** / **Limit** | Market executes now. Limit lets you set a price and an expiry. |
| **From** / **To** | The pair, with balances. **Half** / **Max** fill 50% or 100% of your balance. |
| **TP / SL** | Optional take profit and stop loss attached to the swap. |
| **Est. Total**, **Fee (0.1%)**, **Est. gas** | What you pay, before you confirm. |
Click **Swap** to confirm.
 ### Perps
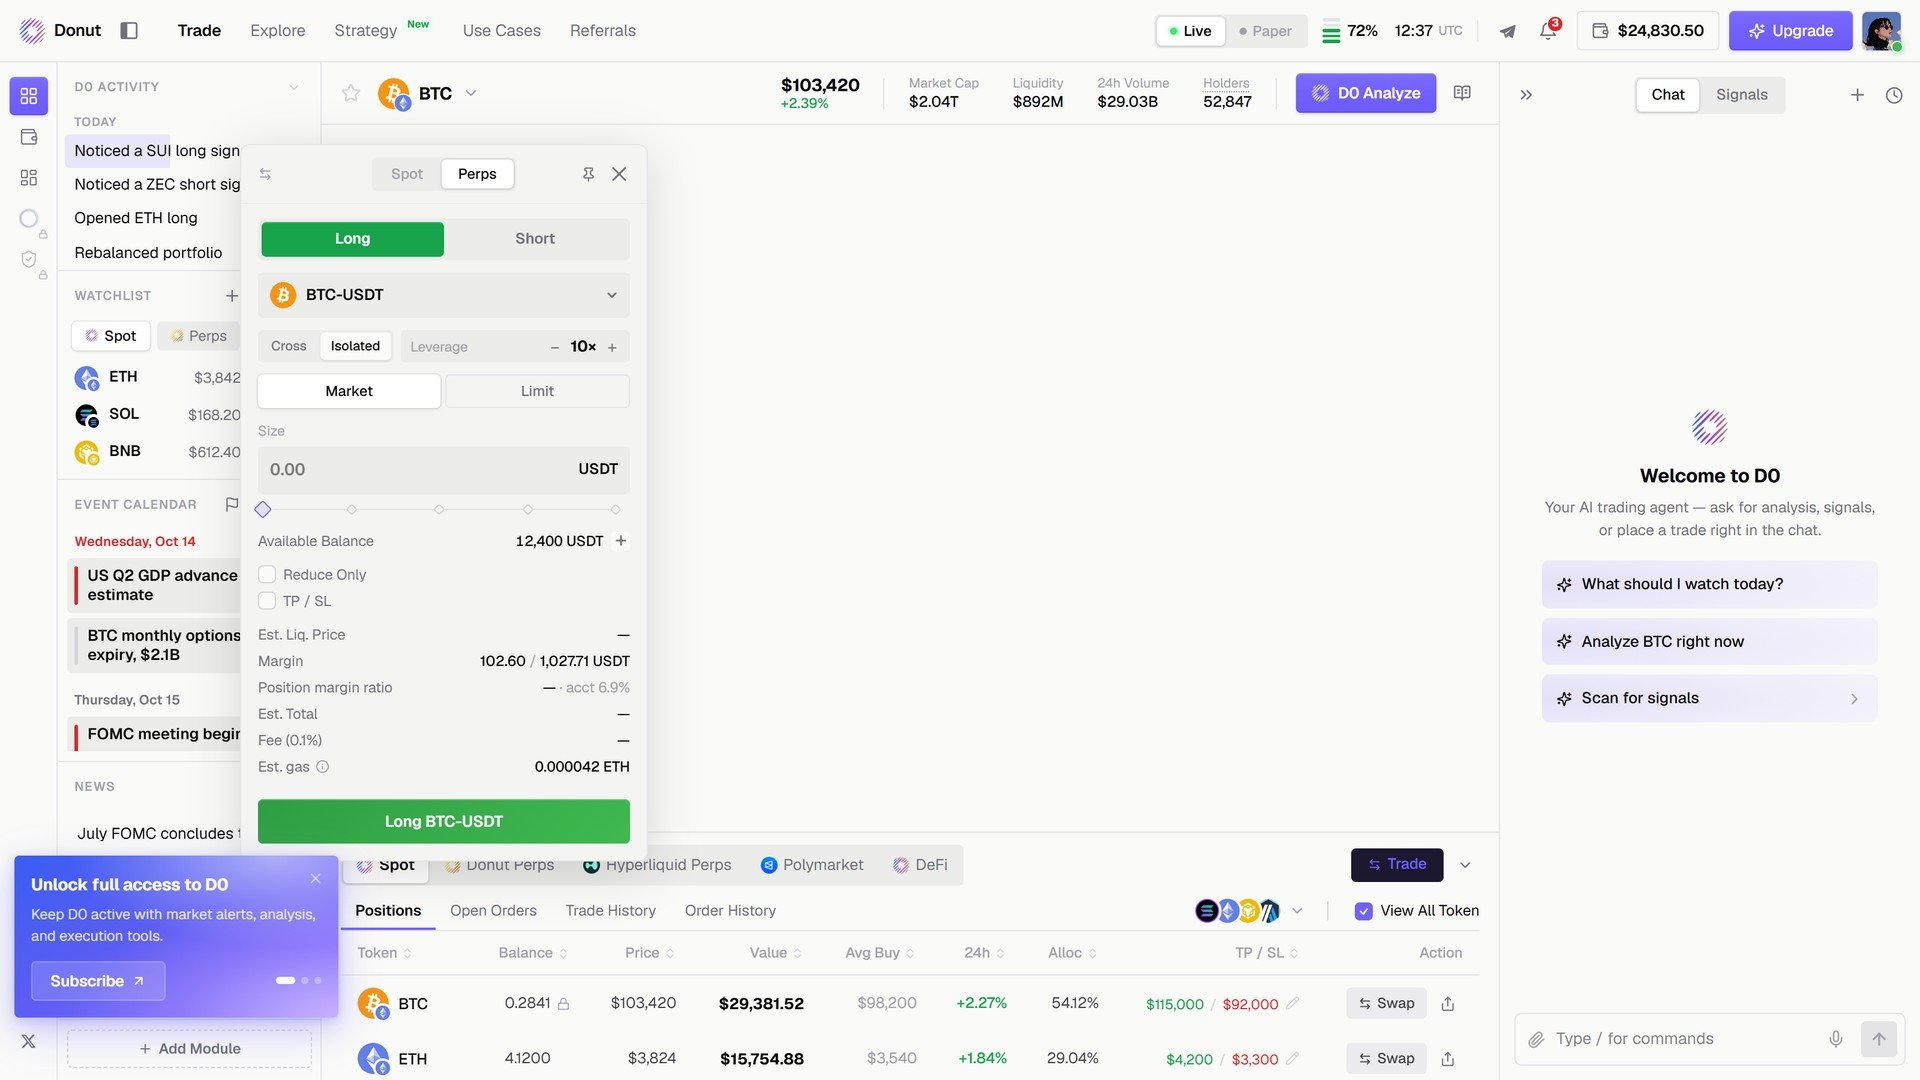
| Field | What it means |
| - | - |
| **Long** / **Short** | Direction. |
| **Cross** / **Isolated** | Cross uses your full balance as margin. Isolated caps risk to the margin you put in. |
| **Leverage** | The multiple, stepped with − and +. |
| **Size** | Position size in USDT, with **Available Balance** underneath. |
| **Reduce Only** | Closes an existing position, never opens a new one. |
| **TP / SL** | Take profit and stop loss, attached to the order as a bracket. |
| **Est. Liq. Price**, **Margin**, **Position margin ratio** | What the position costs and where it gets liquidated. |
Click the execute button (for example **Long BTC-USDT**) to confirm.
### Perps
| Field | What it means |
| - | - |
| **Long** / **Short** | Direction. |
| **Cross** / **Isolated** | Cross uses your full balance as margin. Isolated caps risk to the margin you put in. |
| **Leverage** | The multiple, stepped with − and +. |
| **Size** | Position size in USDT, with **Available Balance** underneath. |
| **Reduce Only** | Closes an existing position, never opens a new one. |
| **TP / SL** | Take profit and stop loss, attached to the order as a bracket. |
| **Est. Liq. Price**, **Margin**, **Position margin ratio** | What the position costs and where it gets liquidated. |
Click the execute button (for example **Long BTC-USDT**) to confirm.
 ## Positions, orders, and history
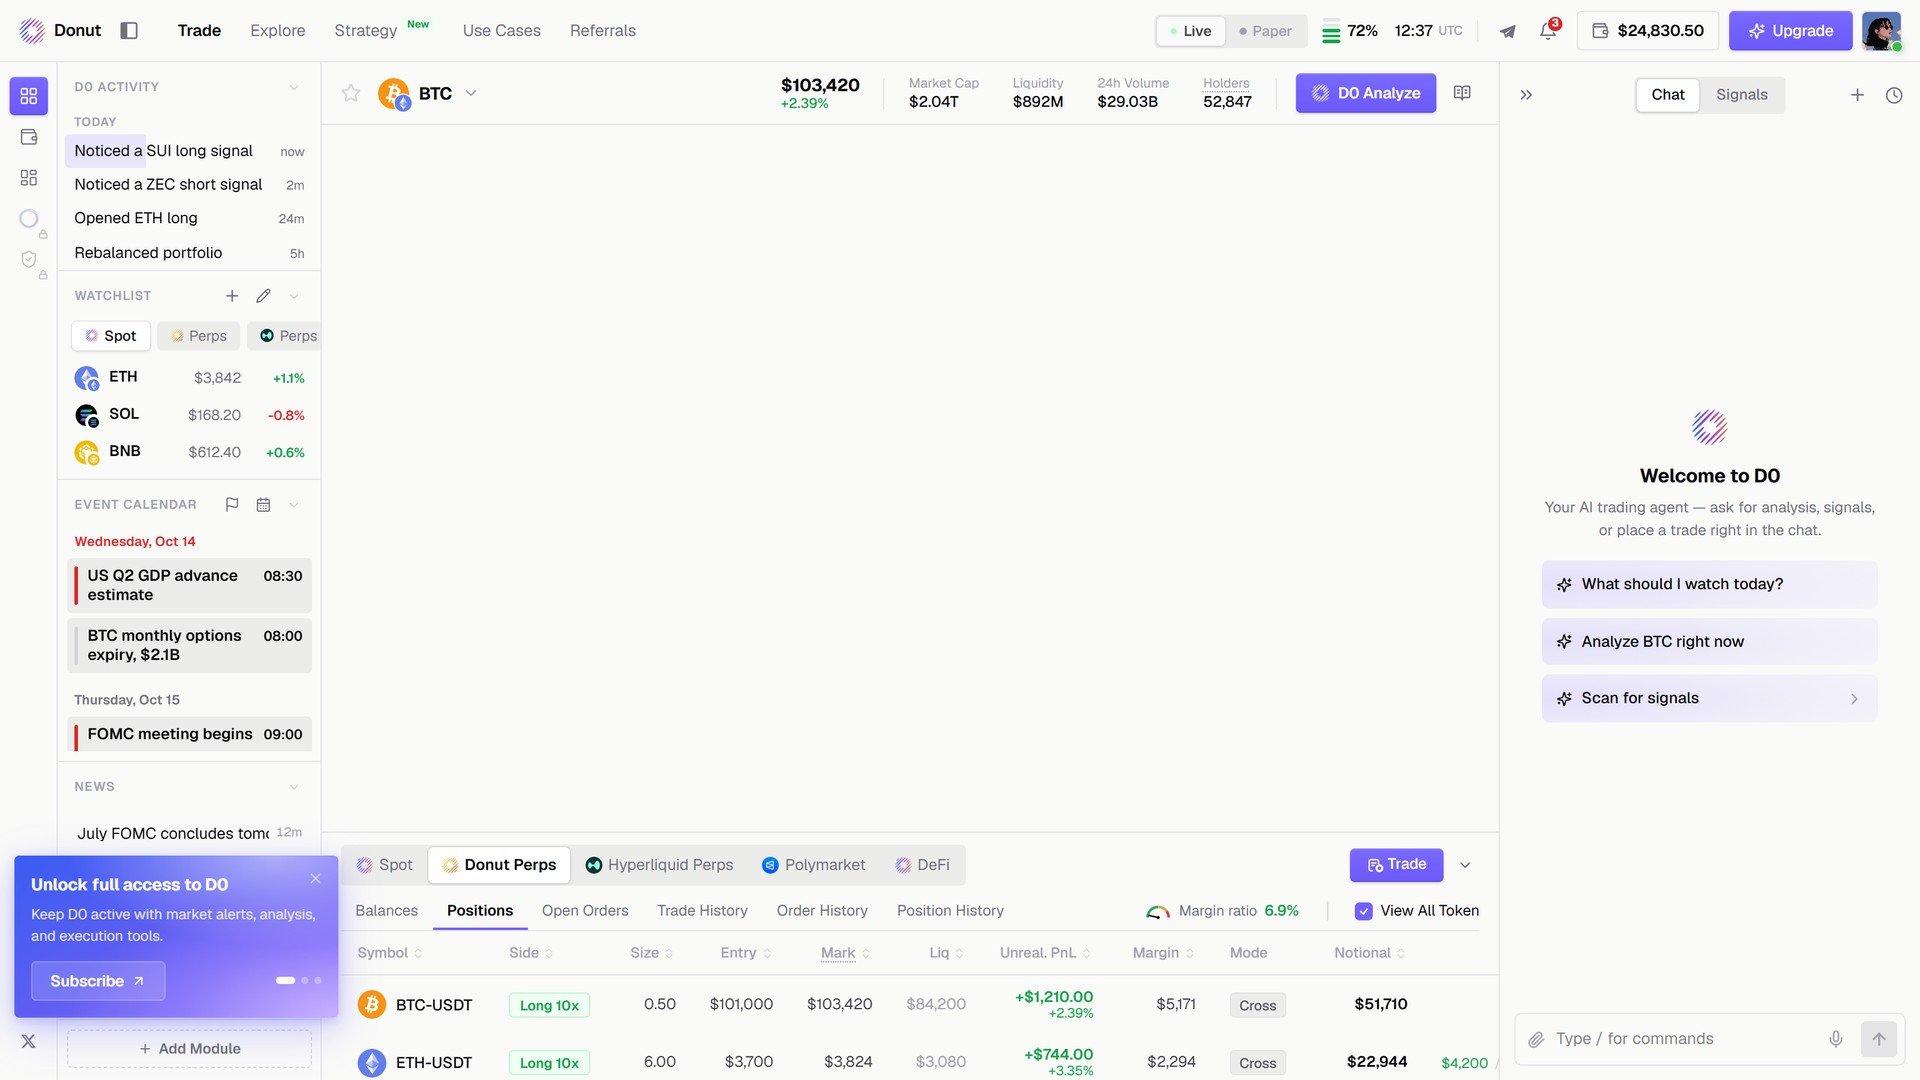
Each venue tab has four views: **Positions**, **Open Orders**, **Trade History**, **Order History**. A chain filter and **View All Token** sit on the right.
## Positions, orders, and history
Each venue tab has four views: **Positions**, **Open Orders**, **Trade History**, **Order History**. A chain filter and **View All Token** sit on the right.
 ## Tips
**Use Isolated margin when testing a new setup.** Cross margin puts your whole balance at risk if the trade goes against you. Isolated caps the loss to what you put in.
**Set TP/SL before you confirm.** Once the order is in, the bracket is live. You can still edit it from the positions table, but it is easier to get it right upfront.
**Signals execute from the card.** A signal card's **Execute LONG** or **Execute SHORT** opens the same modal, pre-filled. See [Signals](/features/thorp-strategy).
## What's next
* [Perpetual Futures](/features/perpetual-futures)
* [Prediction Markets](/features/prediction-markets)
* [Risk Controls](/features/risk-controls)
This documentation is built and hosted on [Mintlify](https://mintlify.com), a developer documentation platform.
## Tips
**Use Isolated margin when testing a new setup.** Cross margin puts your whole balance at risk if the trade goes against you. Isolated caps the loss to what you put in.
**Set TP/SL before you confirm.** Once the order is in, the bracket is live. You can still edit it from the positions table, but it is easier to get it right upfront.
**Signals execute from the card.** A signal card's **Execute LONG** or **Execute SHORT** opens the same modal, pre-filled. See [Signals](/features/thorp-strategy).
## What's next
* [Perpetual Futures](/features/perpetual-futures)
* [Prediction Markets](/features/prediction-markets)
* [Risk Controls](/features/risk-controls)
This documentation is built and hosted on [Mintlify](https://mintlify.com), a developer documentation platform.