> ## Documentation Index
> Fetch the complete documentation index at: https://docs-d0.donutbrowser.ai/llms.txt
> Use this file to discover all available pages before exploring further.
# Strategy Library
> The Strategy page: a deck of live signals on top, the library of backtested strategies underneath. Run one and D0 trades it inside the limits you set.
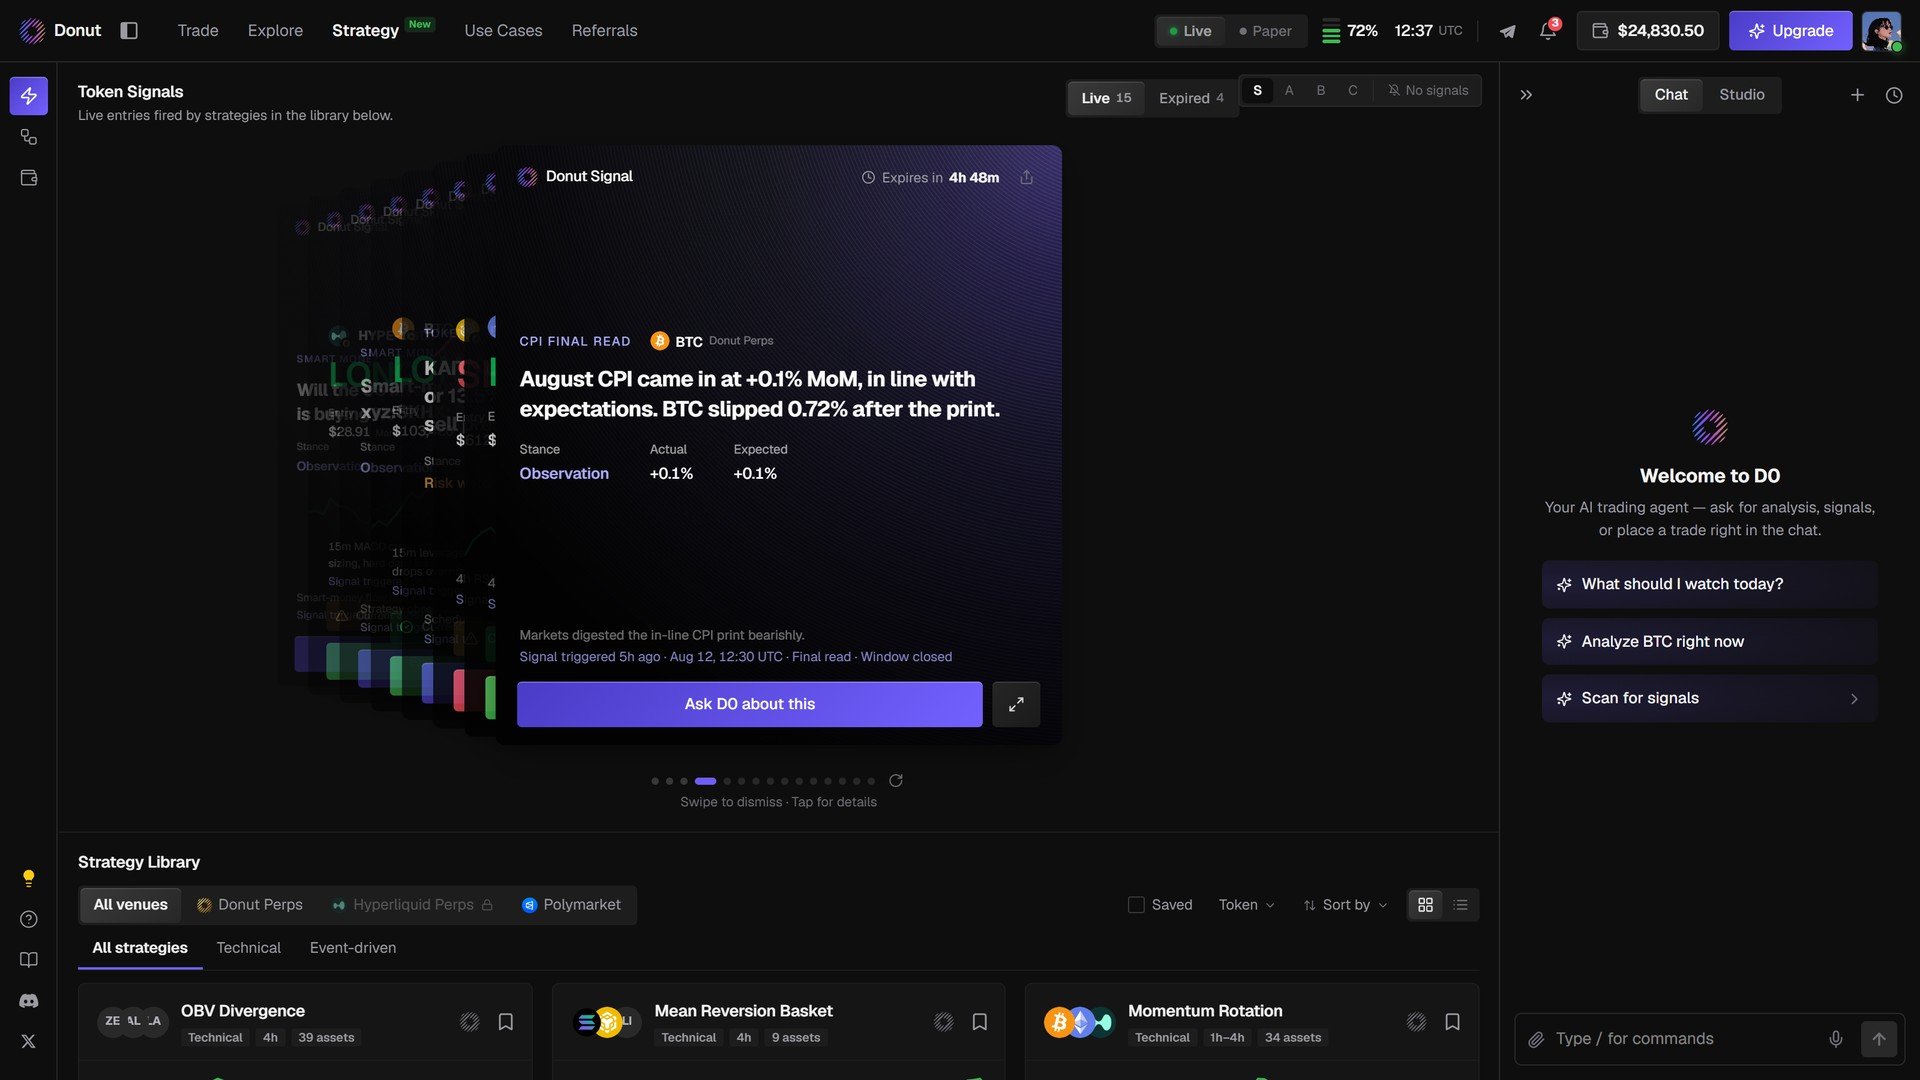
**Strategy** in the top bar opens on two things: the **Token Signals** deck, live entries fired by strategies in the library, and the **Strategy Library** itself.
 ## Token Signals
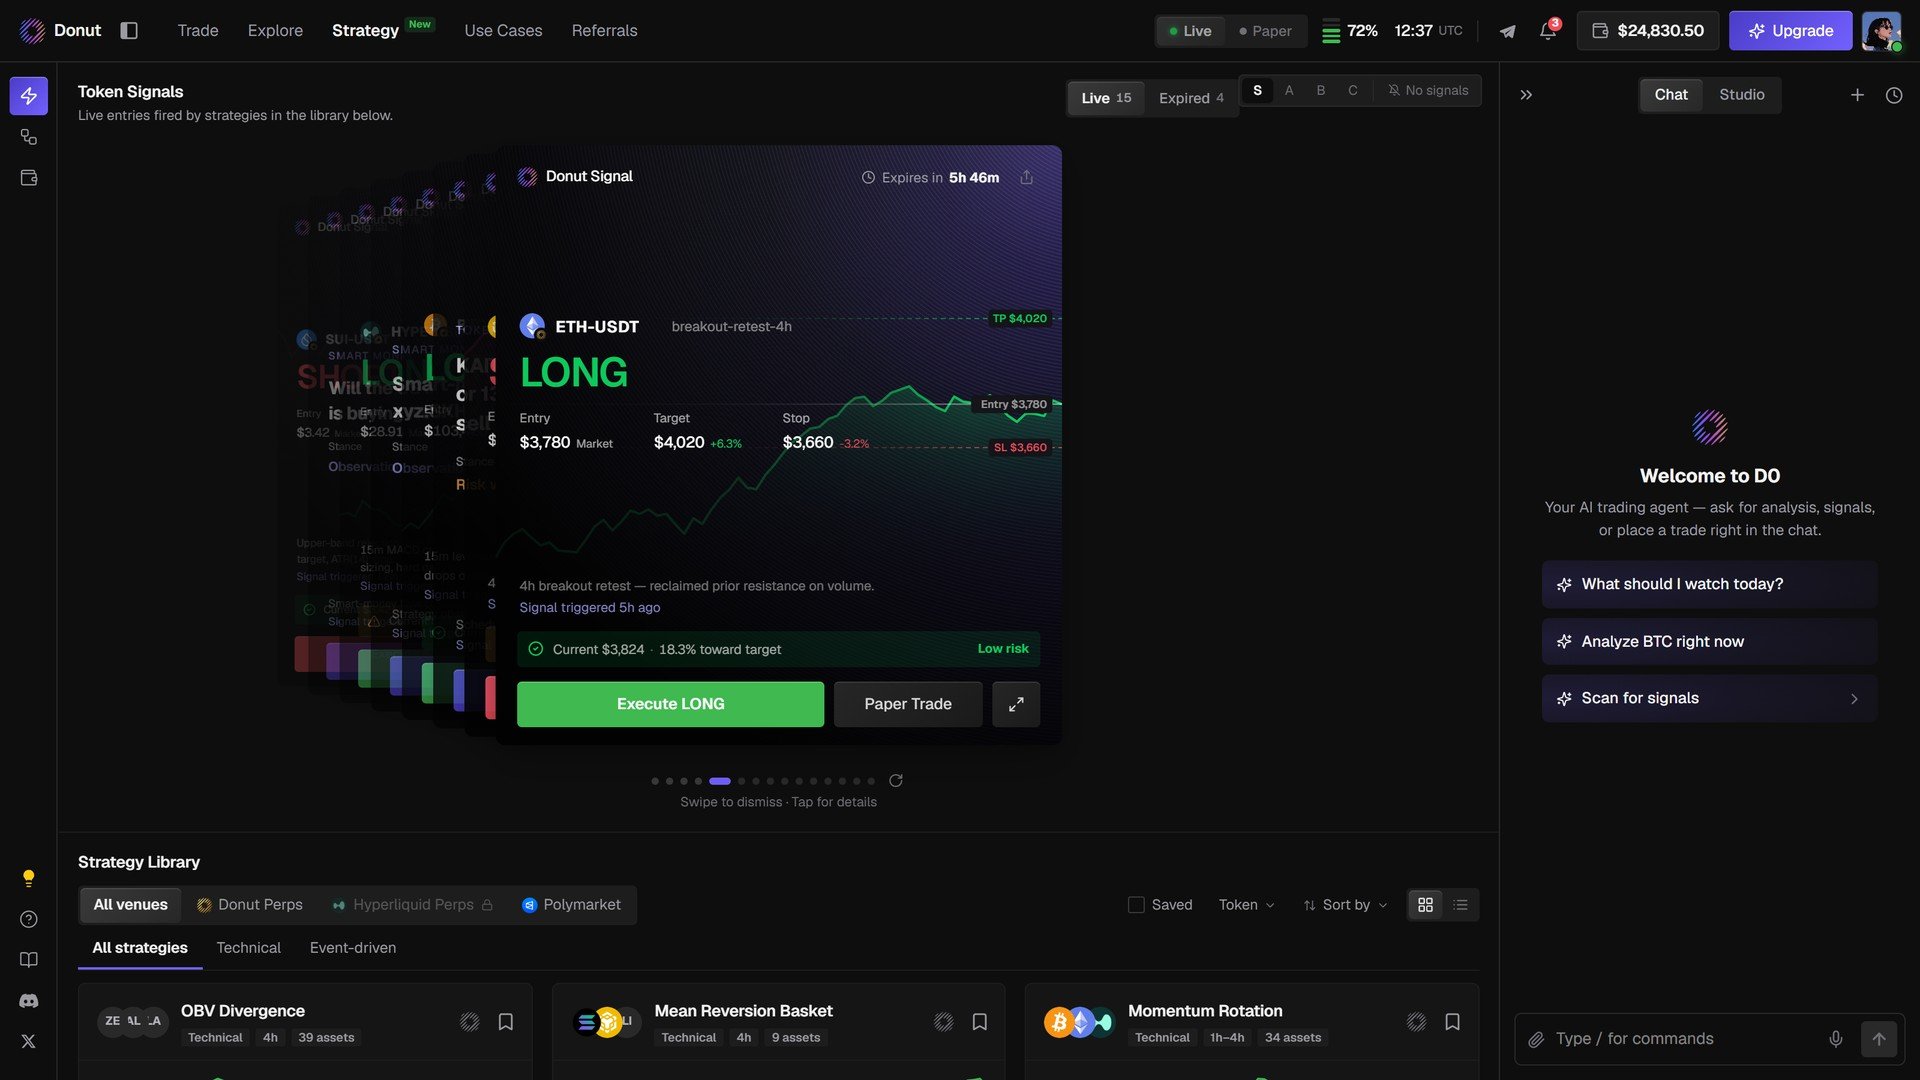
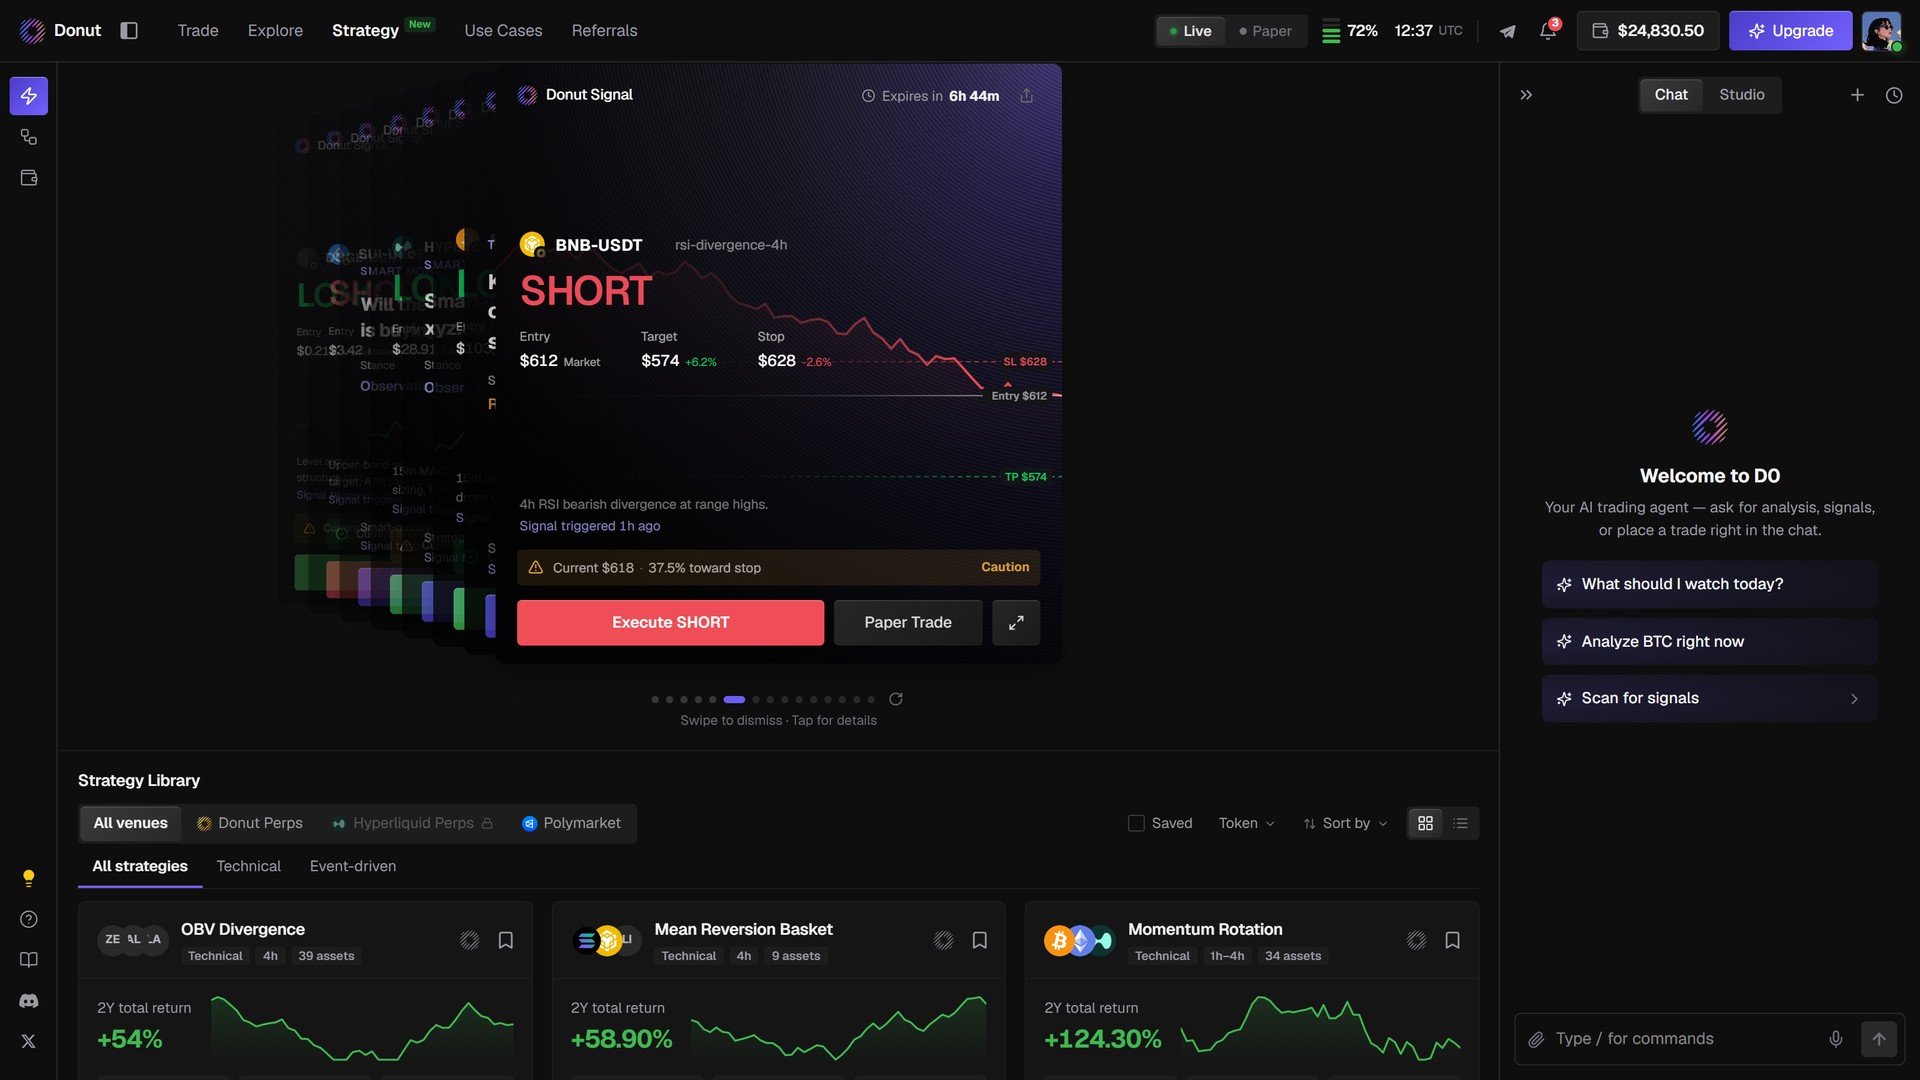
The deck stacks the signals that are live right now (**Live** and **Expired** filters at the top right). A card carries the strategy that fired it, when it expires, the market and direction, **Entry**, **Target**, **Stop**, the reasoning, and three actions: **Execute**, **Paper Trade**, and **Ask D0 about this**. Swipe to dismiss, tap for details.
## Token Signals
The deck stacks the signals that are live right now (**Live** and **Expired** filters at the top right). A card carries the strategy that fired it, when it expires, the market and direction, **Entry**, **Target**, **Stop**, the reasoning, and three actions: **Execute**, **Paper Trade**, and **Ask D0 about this**. Swipe to dismiss, tap for details.
 ## The library
A grid of pre-built strategies. Filter by venue (**All venues**, **Donut Perps**, **Hyperliquid Perps**, **Polymarket**) and type (**All strategies**, **Technical**, **Event-driven**); **Saved**, **Token**, and **Sort by** on the right. Each card shows the name, type · timeframe · assets, the 2Y total return, and the equity curve.
Click a card to open the strategy.
## The strategy page
| Section | What it shows |
| - | - |
| **What this strategy does** | One paragraph. *OBV Divergence: Bullish (price LL + OBV HL) or bearish (price HH + OBV LH) divergence, accumulation/distribution signal, 4h.* |
| **Simulated portfolio value** | The backtest equity curve over the period, with **Simulation settings**: **LEV** (1x to 20x), **SIZE** (5% to 50%), **Returns** net or gross, **Regime**. Change them and the curve recalculates. |
| **Stats** | 2Y net return, 2Y max drawdown, quality score out of 100, number of backtested trades. |
| **Regime performance** | Return by market regime. |
| **Quality** | The score, how many evaluated signals it rests on, and the three components: **Edge**, **Risk/reward**, **Consistency**. |
| **Analysis** / **Trades** / **Specs** | The charts, the individual backtest trades, and the rule spec. |
## The library
A grid of pre-built strategies. Filter by venue (**All venues**, **Donut Perps**, **Hyperliquid Perps**, **Polymarket**) and type (**All strategies**, **Technical**, **Event-driven**); **Saved**, **Token**, and **Sort by** on the right. Each card shows the name, type · timeframe · assets, the 2Y total return, and the equity curve.
Click a card to open the strategy.
## The strategy page
| Section | What it shows |
| - | - |
| **What this strategy does** | One paragraph. *OBV Divergence: Bullish (price LL + OBV HL) or bearish (price HH + OBV LH) divergence, accumulation/distribution signal, 4h.* |
| **Simulated portfolio value** | The backtest equity curve over the period, with **Simulation settings**: **LEV** (1x to 20x), **SIZE** (5% to 50%), **Returns** net or gross, **Regime**. Change them and the curve recalculates. |
| **Stats** | 2Y net return, 2Y max drawdown, quality score out of 100, number of backtested trades. |
| **Regime performance** | Return by market regime. |
| **Quality** | The score, how many evaluated signals it rests on, and the three components: **Edge**, **Risk/reward**, **Consistency**. |
| **Analysis** / **Trades** / **Specs** | The charts, the individual backtest trades, and the rule spec. |
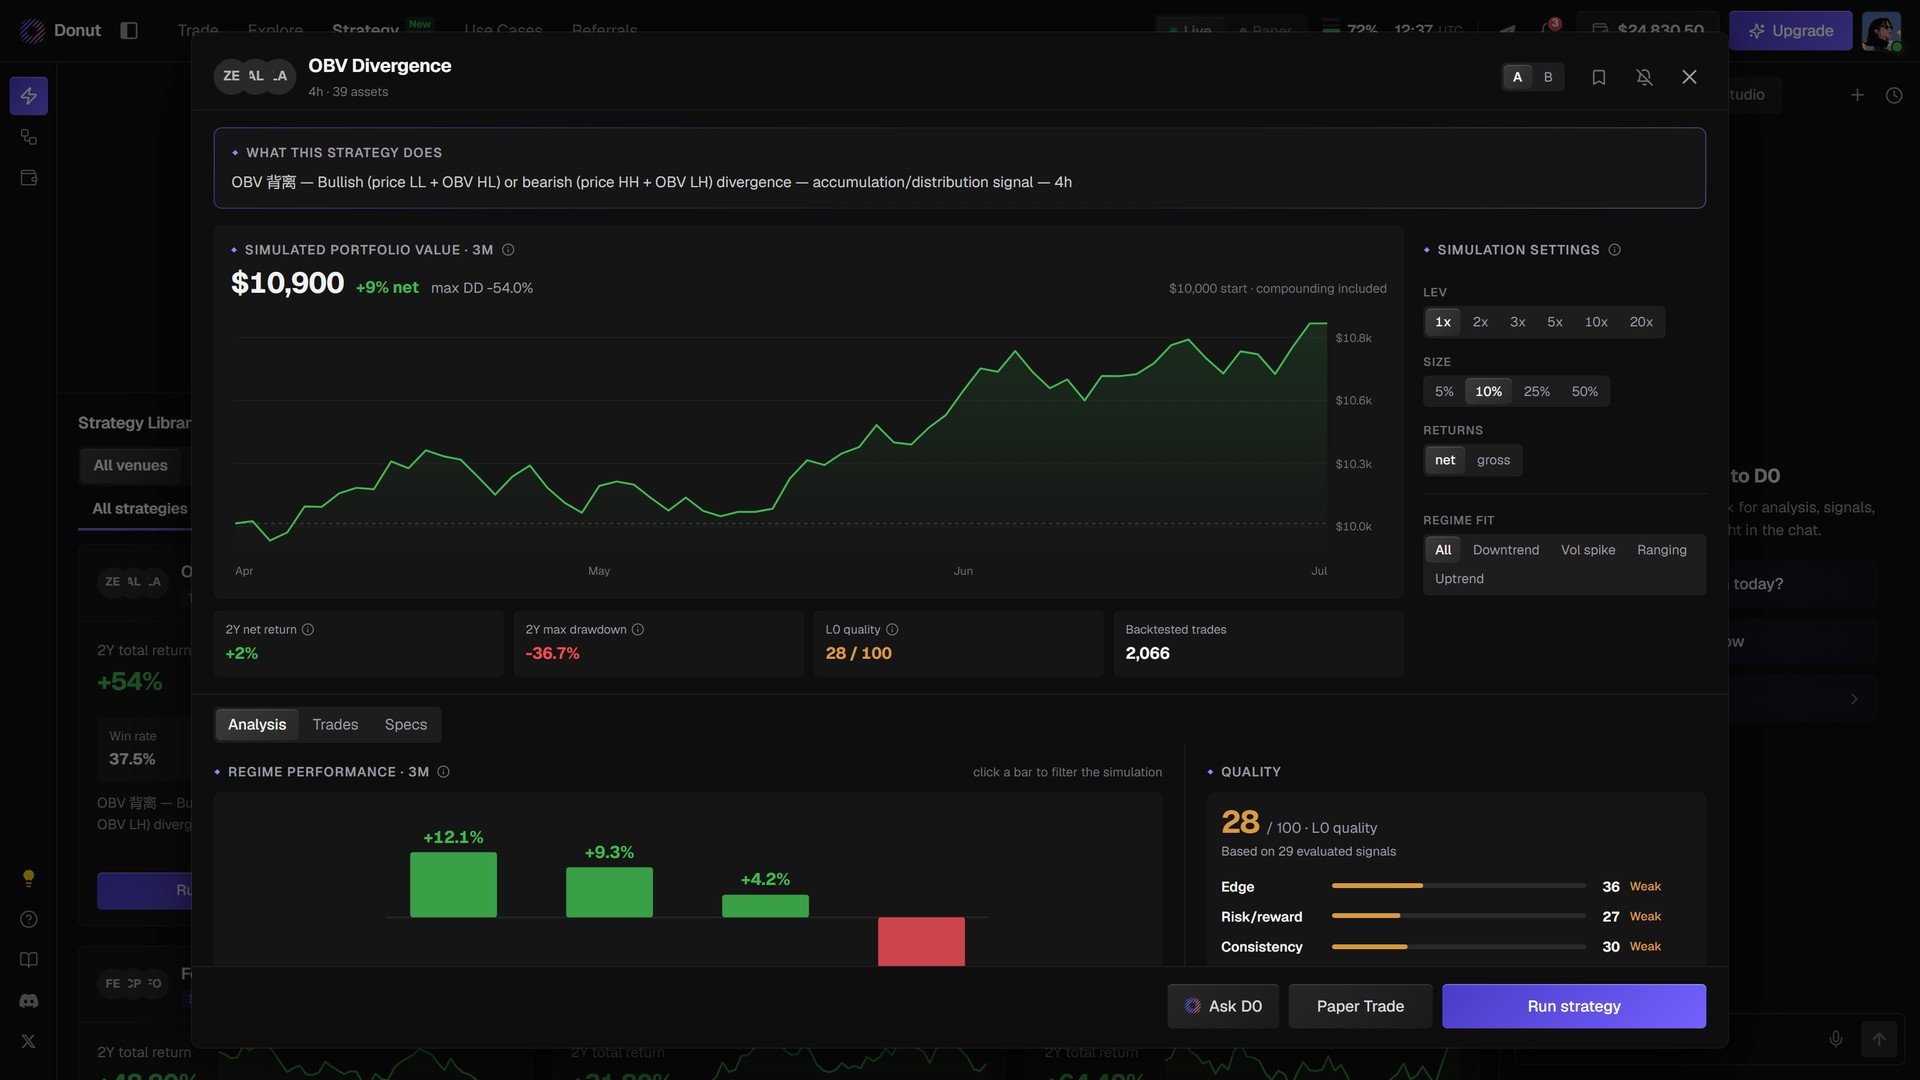 Three buttons at the bottom: **Ask D0**, **Paper Trade**, **Run strategy**.
A quality score below 50/100 means the backtest rests on too few evaluated signals to be reliable. Run those strategies in Paper first. More backtested trades does not fix a low score on its own.
## Running a strategy
Click **Run strategy**. The **Position management** modal opens, where you set leverage, capital per signal, and a daily loss cap, with the resulting position size, margin, worst case, and how many signals fit under the cap computed as you type. See [Run a Strategy: Position Management](/strategies/position-management).
## Tips
**Check the quality score before you commit capital.** 29 evaluated signals is not the same as 300.
**Proven Strategies on Explore is the same library, ranked.** Four featured systems with their long-run return, and **Run strategy** on each row. See [Explore](/explore/overview).
## What's next
* [Run a Strategy: Position Management](/strategies/position-management)
* [Signals](/features/thorp-strategy)
* [Live vs Paper Mode](/getting-started/live-vs-paper)
This documentation is built and hosted on [Mintlify](https://mintlify.com), a developer documentation platform.
Three buttons at the bottom: **Ask D0**, **Paper Trade**, **Run strategy**.
A quality score below 50/100 means the backtest rests on too few evaluated signals to be reliable. Run those strategies in Paper first. More backtested trades does not fix a low score on its own.
## Running a strategy
Click **Run strategy**. The **Position management** modal opens, where you set leverage, capital per signal, and a daily loss cap, with the resulting position size, margin, worst case, and how many signals fit under the cap computed as you type. See [Run a Strategy: Position Management](/strategies/position-management).
## Tips
**Check the quality score before you commit capital.** 29 evaluated signals is not the same as 300.
**Proven Strategies on Explore is the same library, ranked.** Four featured systems with their long-run return, and **Run strategy** on each row. See [Explore](/explore/overview).
## What's next
* [Run a Strategy: Position Management](/strategies/position-management)
* [Signals](/features/thorp-strategy)
* [Live vs Paper Mode](/getting-started/live-vs-paper)
This documentation is built and hosted on [Mintlify](https://mintlify.com), a developer documentation platform.